The National Community Action Partnership’s Needs Assessment allows you to create customized
reports at the click of a button.
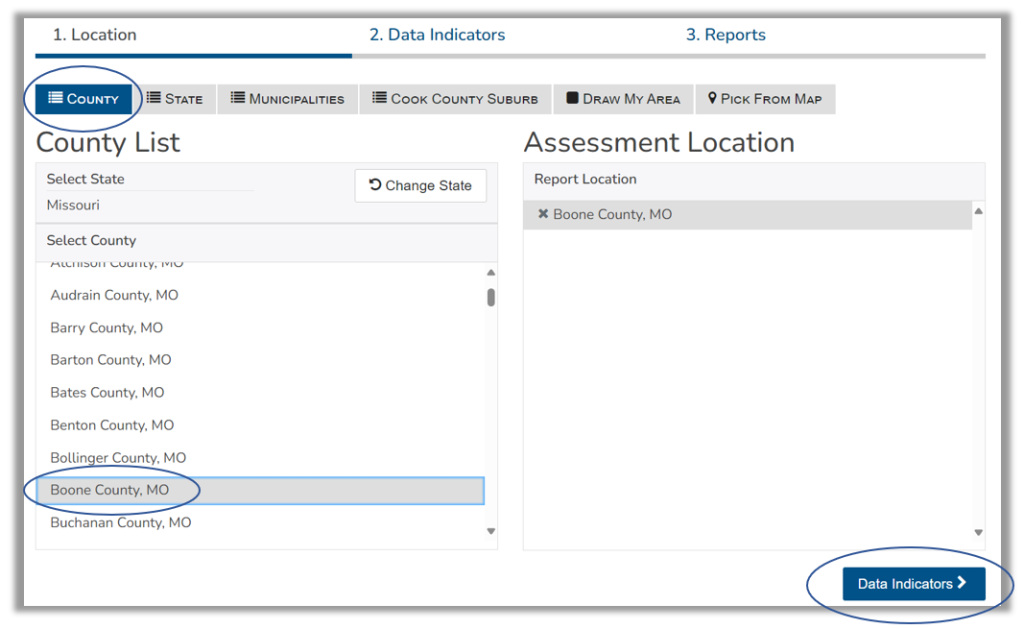
STEP ONE: Define your report location. Click the tabs at the top of the assessment tool to select a location type (e.g., County, State, Municipalities). Click the “Pick From Map” tab to select from additional location options ( e.g. ZIP code, school districts, congressional districts, etc.).
Municipalities are available for Massachusetts only.


STEP TWO: Finish defining your location. Click the names of one or more locations from the list on the left (e.g., Audrain County, Barry County, Barton County). Your selections will appear, and can be managed, on the right under Assessment Location.
–> Click the “Data Indicators” button at the bottom right to move to the next step.
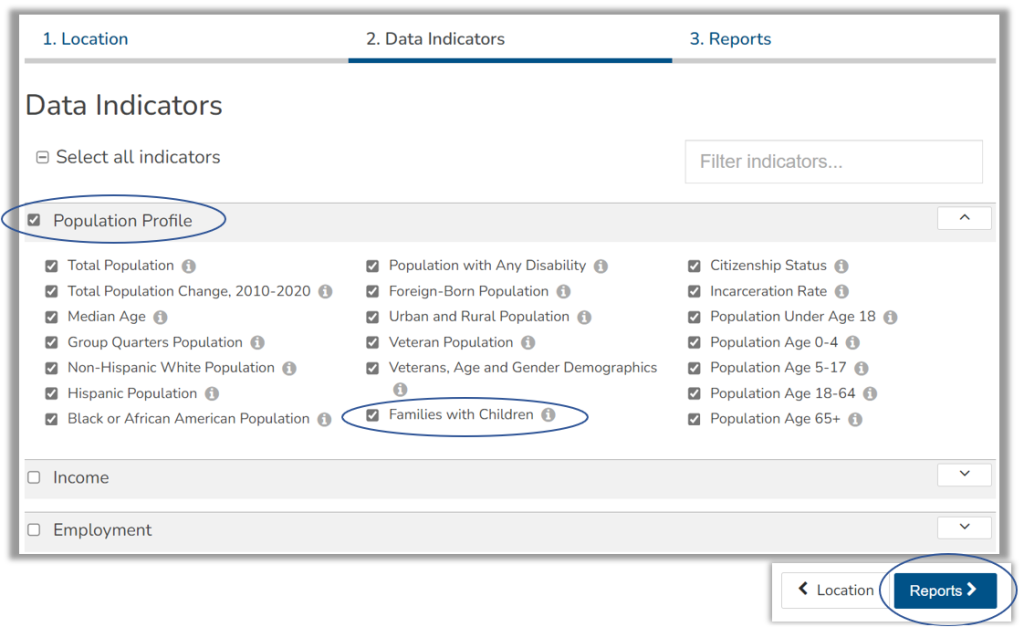
STEP THREE: Select the data indicators you want to include in your report.
Click the check box next to the indicator name (e.g., total population, population with any disability, citizenship status) to add an individual indicator.
Click the check box next to the data category name (e.g., population profile, income, employment) to add an entire data category.
–> Click the “Reports” button at the bottom right to generate your report.
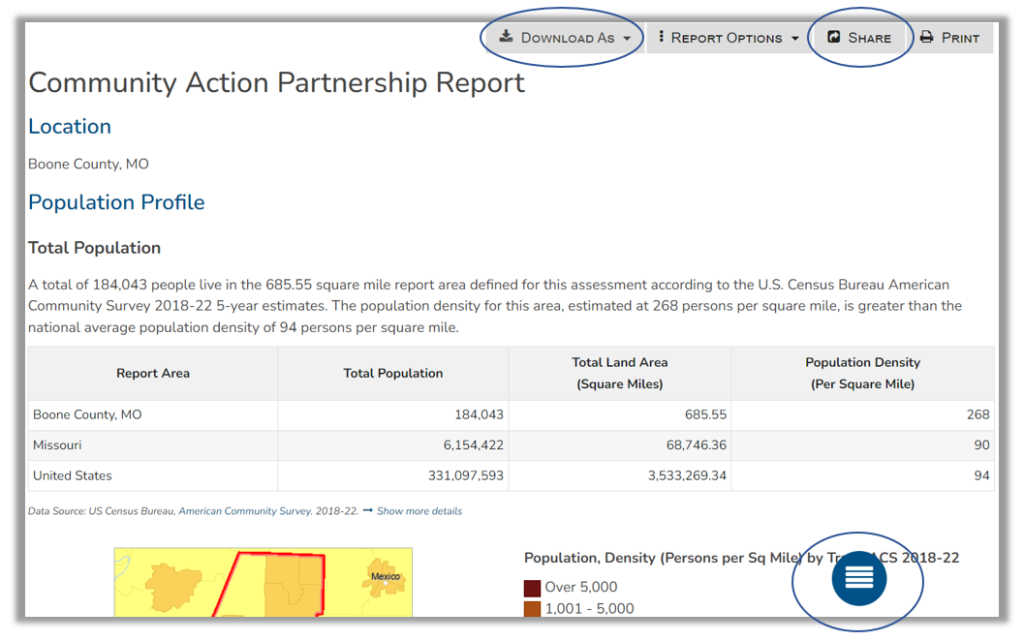
STEP FOUR: Explore your completed report. Scroll down to view data or use the round menu button at the bottom of the page to jump to specific indicators.
STEP FIVE: Click the “Share” button at the top of the report to share your report via a link or on social media. Click the “Download As” button to download your report as a PDF file, Excel table, or Microsoft Word document.
Stuck and need assistance? Email us at help@cares.missouri.edu